There are only a couple of simple secrets to cooking the perfect fool-proof hard-cooked egg — tender, no green ring around the yolk, easy to peel, ready for a meal or a snack.
Everyone needs to know how to make a hard-cooked egg. It’s really easy as long as you have a medium pot, some week-old eggs, and you remember to set the timer. For the sake of beginning cooks, I am giving detailed instructions.
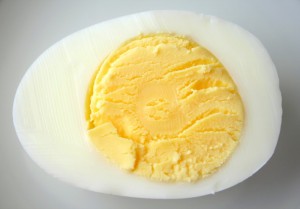
This method of cooking makes the eggs tender but not rubbery, and cooling them quickly at the end helps to prevent that little green colored layer from forming around the yolk. *See below for your science lesson on why the green happens.
How to cook hard-cooked eggs
1. To hard cook eggs, buy large eggs a week before you plan to use them. We use older eggs for hard-cooked eggs because eggs 7-10 days old are easier to peel when boiled. But to be honest and practical, use what you have. On occasion I have hard-cooked freshly bought eggs and it has all worked out fine. If you have the luxury of planning ahead, get the eggs ahead.

2. Place eggs in a medium-sized heavy pot, add a pinch of salt and cover with water by about 1-1 1/2 inches above the top of eggs. Cover the pot and heat until boiling. This will only take a few minutes (exact time will depend on size of pot, how much water is in it, how high your heat is, etc., so don’t leave the kitchen or you will come back to a furiously boiling pot and you won’t know how long it has been boiling).
3. As soon as the water comes to a full boil (listen up, this is important!), turn heat off, leave pot lid on, and allow the eggs to sit in the hot water for 12 minutes. Set the timer so you are sure.

4. When timer rings, take the pot over to the sink, pour off the boiling water and run cold water over the eggs; pour water off again and replace with more cold water. Leave the pot with cold water in the sink until the eggs cool down. For more rapid cooling, I usually add ice to the cold water in the pot and let the pot sit for a few minutes. When eggs are cool, drain the pot and use the eggs, or label and refrigerate them.
There, that was easy, wasn’t it? Once you make hard-cooked eggs this way, you won’t have to ever consult this again. Just remember 12 minutes.
How to peel hard-cooked eggs
You can either bang the cooked and cooled eggs against each other in the pot (shake the pot back and forth a few times), or roll the egg on the counter under the palm of your hand. Then hold the egg under slowly running water as you peel the shell off. The water helps to loosen the rest of the shell as you are peeling.
(Also, the older eggs will aid in your peeling. According to Shirley Corriher in “Cookwise,” the ease of peeling is “related to pH, a measure of acid/alkaline levels. Older eggs, which have lost some of their carbon dioxide, are more alkaline, with a pH of 8.7-8.9 or higher. Hard-cooked older eggs are easier to peel than fresh eggs. Because you want to keep this high level of alkalinity, you should NOT add vinegar to the cooking water,” she says. Also, quick cooling helps with easy peeling.
Label the hard-cooked eggs
There are two easy ways to label hard-cooked eggs that will be refrigerated after cooking. Why label? Because a hard-cooked egg in a white shell looks eggsactly the same as a fresh egg in a white shell.
 Mark on the shells with a pencil or marker so you can tell which ones are cooked. In my childhood, there was often a bowl of eggs in the frig with the letters “HB” on them (for hard-boiled).
 Or, when you place the eggs in the pot, add some papery onion skin (either from yellow or red onions) along with the salt and water. The onion skin will dye the egg shells lightly during the cooking/steeping time, and you will have colored egg shells which can signify hard-cooked eggs to you.
What to do with the used egg shells
Turn them into the soil in your garden and bury them, or throw them in your compost heap. Yes please, either one.
*A science lesson about the green ring around the yolk
*What is that green layer that forms around the yolk sometimes? According to food sleuth Shirley Corriher, that ugly green stuff is the “result of iron in the yolk combining with sulfur in the white to form green iron sulfide. While the egg is cooking, heat speeds up the chemical reaction. The longer the egg cooks, the greater the chance for discoloration, so watch the time carefully. Quick cooling also helps prevent the green layer from forming.” (There is nothing wrong with the green stuff other than its appearance.) Now you know.
(Source: “Cookwise: The Hows & Whys of Successful Cooking,” by Shirley O. Corriher.)
To practice your new egg skill, you might like to try these recipes that use hard-cooked eggs

 Pin the image below to your Pinterest board to save this method.

There you have it…eggsactly perfect eggs!
This post was originally published Oct. 24, 2010, and has been refreshed and republished today.